Scan to BIM gives a project team an accurate, intelligent BIM model of a building that already stands, built from a 3D laser scan of its current condition. The process is also called 3D scan to BIM, laser scan to BIM, or reality capture to BIM, and the model it produces is an as-built BIM model. The main benefit of scan to BIM is as-built accuracy, which cuts the clashes and rework that start from outdated drawings. The same scan also shortens existing-condition documentation, so design work can start sooner.
The workflow runs in four stages, from setting the project requirements to the modeling that rebuilds the point cloud into a finished, as-built model. A scanning company usually captures the site, and a specialist modeling team handles the final stage. The finished model guides renovation in design, verifies built work in construction, and supports facility and heritage management in operations.
The sections below also cover whether scan to BIM is worth the investment, what it costs, the software behind it, the four challenges teams plan for, how ViBIM delivers the modeling stage across three case studies, and how scan to BIM differs from BIM and the terms it gets confused with.
What Is Scan to BIM?
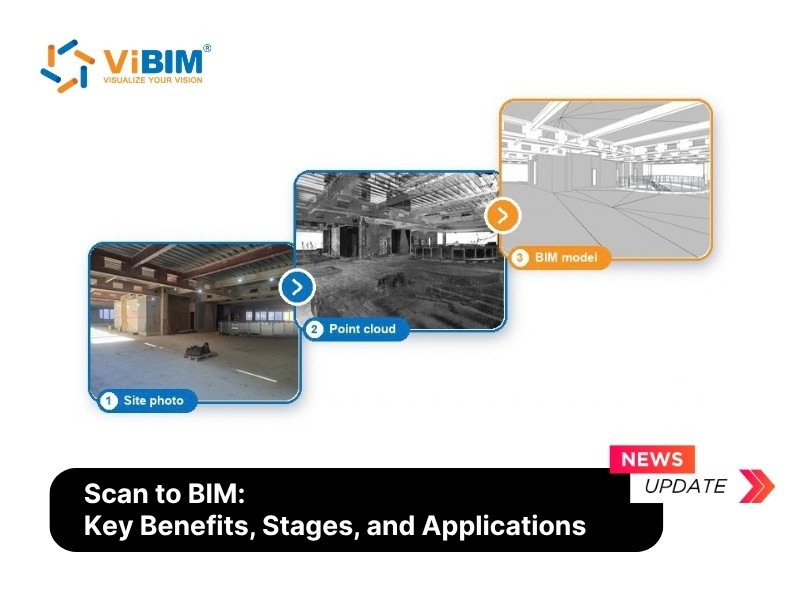
Scan to BIM is a systematic workflow that transforms 3D laser scan data (point cloud) of an existing building into an intelligent Building Information Model (BIM). This digital conversion process captures existing building conditions with high precision, creating a reliable single source of truth for renovation, retrofit, and facility management projects.
Once the project requirements are set, the workflow runs through three core components:
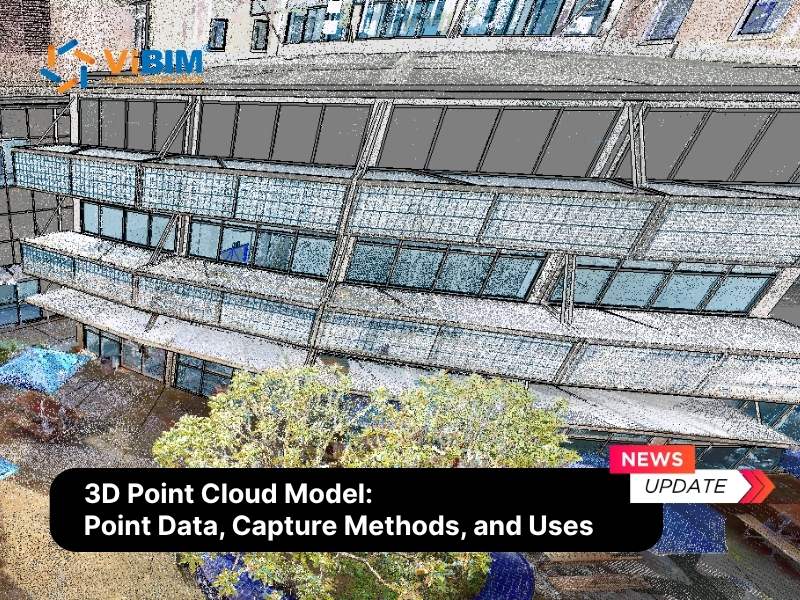
- Data capture: 3D laser scanning records the site as a point cloud, the scan data made of a dense field of measured X, Y, Z points.
- Data processing: The individual scans are registered and cleaned into one unified cloud.
- BIM modeling: That point cloud is rebuilt in Autodesk Revit into a set of intelligent parametric objects such as walls, columns, and ducts.
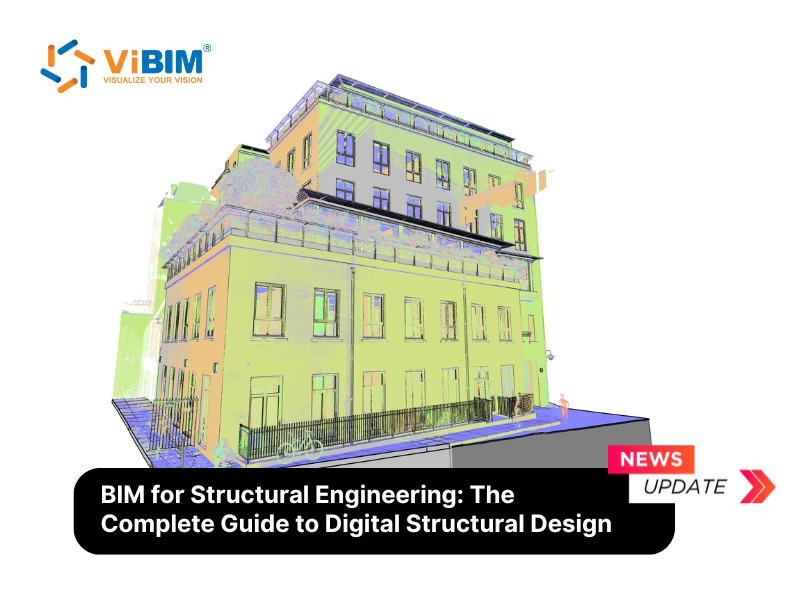
Architects, engineers, and contractors use the model as the measured base for work on the existing building, and owners and facility managers keep it as the record of the asset after handover. The finished as-built BIM model is detailed to the LOD agreed in the project scope. The architectural, structural, and MEP elements of the building and the topography of its site sit in it as separate objects, each carrying data such as material, dimensions, and equipment information.

Why Is Scan to BIM Needed?
Scan to BIM is needed to convert the real conditions of an existing building into a precise, data-rich BIM model, which removes the errors of outdated drawings and manual measurement. Every design or construction decision built on a wrong dimension gets paid for later on site. A model built from the scan gives project teams accurate dimensions, faster existing-condition documentation, a reliable base for building operations, and a contact-free record of heritage structures.
Improves Dimensional Accuracy
Modeling every element directly on a registered point cloud improves dimensional accuracy, because the scan records every visible surface as measured points and each dimension in the model is read from that cloud. New components designed from the model fit existing conditions the first time, which cuts rework. Older 2D drawing sets record the design intent and leave out what decades of renovations changed. On a Canada train station modeled by ViBIM, the modeled railway tracks deviate no more than 10 mm from the scan. That accuracy still depends on the quality of the scan and the skill of the modeling team.
Speeds Up Existing-Condition Documentation
A single scanning campaign speeds up existing-condition documentation, since a missed measurement is taken from the point cloud instead of on a return site visit. A manual measured survey can run for weeks, while laser scanning covers the whole site in days, so design and coordination start sooner.
Creates a Reliable Model for Building Operations
Asset data attached to measured geometry creates a reliable model for building operations, because each piece of equipment sits in the model where it sits in the building. The data-rich output becomes the foundation for maintenance, space planning, and digital twins across the building’s life. Facility teams without an accurate model work from assumptions, and each later renovation has to start with a new survey.
Supports Heritage Preservation
Non-contact laser scanning supports heritage preservation by recording carvings, moldings, and cracks from a distance. The scan captures millimeter-level detail too fine for hand tools to measure, which is the level of accuracy a faithful restoration depends on. Heritage and historic sites cannot be hand-measured without risk or contact.
For the numbers behind each of these benefits, see our analysis of the benefits of scan to BIM.
Turning that raw scan into the model is itself a defined process.
How Does the Scan to BIM Process Work?
The scan to BIM process works by identifying the project requirements, laser scanning the building, registering the scans into one point cloud, and modeling that point cloud into a BIM model.
The four stages of the scan to BIM workflow are listed below.
- Identifying project requirements: Scope, LOD, and accuracy tolerances.
- Planning and 3D laser scanning: On-site capture of the point cloud.
- Processing and registering the point cloud: Merging and cleaning the scans.
- Scan to BIM modeling: Converting the cloud into a BIM model.
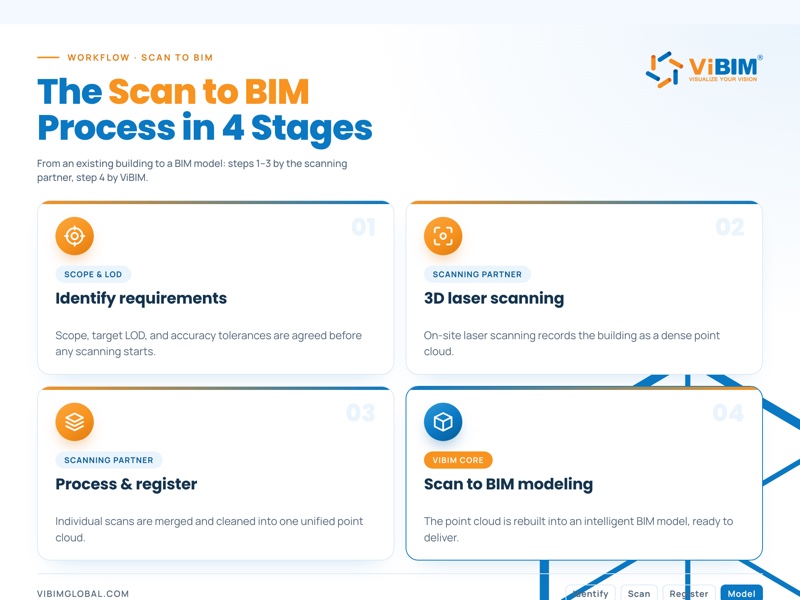
Stage 1. Identifying Project Requirements
Identifying project requirements establishes the foundational scope, BIM level of development (LOD), and accuracy tolerances for the model. This discovery phase determines what the model is for, whether architectural visualization, structural analysis, or MEP coordination.
Stakeholders agree on the target LOD, such as LOD 200 for broad planning or LOD 300 for detailed design, the level of information (LOI), the tolerance, and the disciplines to model. Every later stage works to that agreed scope, and setting it upfront prevents expensive scope creep and remodeling.
Stage 2. Planning and 3D Laser Scanning
Planning and 3D laser scanning record the building as a dense point cloud, with scanner positions and point density set before capture.
The two parts of planning and 3D laser scanning are listed below.
- Planning: Technicians map out scanner positions so that critical areas are not occluded, then set the point density and safety requirements before deployment.
- Data capture: High-precision 3D laser scanning with instruments from Leica, Faro, or Trimble records millions of points into a dense point cloud at millimeter-level precision, the raw input for any 3D scanning to BIM project.
This capture step is where a 3D scan to BIM project succeeds or fails, since overlapping stations, consistent point density, and control targets are what make scans for BIM modeling reliable. Mobile scanners such as the Leica BLK2GO record at a lower density than terrestrial scanners, which limits the level of detail the model can reach. Buildings that need high accuracy and detail are best captured with a terrestrial laser scanner.

Stage 3. Processing and Registering the Point Cloud
Processing and registering the point cloud aligns the individual scans into a single, unified 3D point cloud and removes noise before modeling. Specialists use software such as Autodesk ReCap Pro, Trimble RealWorks, or Leica Cyclone to stitch the scans together based on common targets or shared geometric features, a step known as point cloud registration.
The same stage cleans the data through point cloud noise filtering, removing artifacts such as moving people or temporary equipment, so the result is a clean registered point cloud, ready for modeling. Any registration error left in that cloud carries into every element modeled from it.

Because of the complexity and expertise involved, the process typically splits into two phases. Stages 1 to 3 are usually handled by a professional scanning company, since capture needs scanners and a crew on site. ViBIM performs Stage 4 from the registered point cloud.
Stage 4. Scan to BIM Modeling
Scan to BIM modeling converts the registered point cloud into an intelligent BIM model. Modelers carry out the laser scan to BIM conversion by rebuilding each element of the building as a parametric object on top of the cloud, to the LOD and tolerance set in Stage 1.
ViBIM runs the modeling stage in five steps: data input and transfer, bidding and planning, execution and modeling, quality assurance and control, and deliverables.
Data Input and Transfer
Data input and transfer brings the registered point cloud from the scanning partner to the modeling team. Among the point cloud file formats, the modeling team prioritizes indexed Autodesk ReCap files (.RCP or .RCS) for data integrity and also accepts E57. Large datasets move through a secure FTP server or cloud platforms such as Box, Google Drive, and ACC, with individual RCS files kept under 5GB or packed as a single compressed (.zip) dataset.
Bidding and Planning
Bidding and planning aligns the modeling scope with the client’s goals before work starts. The technical team checks every element against the required LOD, LOI, and tolerance, splits the work into tasks with time estimates, and resolves any ambiguity in the scope with the client before the schedule is set.
Execution and Modeling
Execution and modeling is the production step, where the model is built in Revit across Architecture, Structure, MEP, and Topography. Modeling follows the client’s own guidelines and is compatible with the BIMForum LOD Specification and ISO 19650.
Quality Assurance and Control
Quality assurance and control keeps the model true to the scan through a two-layer independent check. The checkers verify geometry and parameters, then measure the model’s deviation against the original point cloud to catch missing or misaligned elements. Clients can run the same review with a scan to BIM checklist before they accept the model at handover.
Deliverables
The deliverables of Stage 4 are the validated model as a Revit .RVT file, an IFC file, and AutoCAD .DWG drawings.
- Revit native: The .RVT file is the editable model the client’s team keeps working in.
- Interchange: An IFC file carries the model into other BIM platforms.
- Documentation: AutoCAD .DWG files hold the 2D as-built drawings.

That finished model then goes to work across the building lifecycle, from design checks through construction to daily operations.
What Are Scan to BIM Applications?
Scan to BIM applications are as-built documentation, renovation and retrofit, clash detection and MEP coordination, construction verification, off-site fabrication, facility management, heritage preservation, and infrastructure and civil works. These applications fall into three phases of the building lifecycle: design and planning, construction, and operations and maintenance.
How Is Scan to BIM Used in Design and Planning?
Scan to BIM is used in design and planning to document existing conditions, plan renovations, and catch clashes before construction starts. Architects and structural and MEP engineers take the existing walls, levels, and services straight from the model into new design work.
The three design-phase applications are listed below.
- As-built documentation: The model gives a precise digital record of a building’s current state before design begins.
- Renovation and retrofit: New elements are designed against the existing structure as measured, with confidence that they fit it exactly.
- Clash detection and MEP coordination: The model catches conflicts between new designs and existing conditions before construction.
How Is Scan to BIM Used During Construction?
Scan to BIM is used during construction by contractors and fabricators to verify built work against the design model and to fabricate components off site from verified dimensions.
The two construction-phase applications are listed below.
- Construction verification: A scan of site progress is checked against the design model for accuracy, so deviations are caught before later work covers them.
- Off-site fabrication: Prefabricated components are made from verified as-built dimensions, so they fit on installation day.
How Is Scan to BIM Used in Operations and Maintenance?
Scan to BIM is used in operations and maintenance to manage facilities, conserve heritage buildings, and maintain infrastructure assets.
The three operations-phase applications are listed below.
- Facility management: The facility team schedules maintenance and plans space from the model and its asset data.
- Heritage preservation: Conservation teams use the model as the documentation of a historic building for restoration and monitoring.
- Infrastructure and civil works: Roads, bridges, and rail corridors are captured as accurate terrain and asset models that owners use to maintain the network.
Applications this broad raise the question of whether the model is worth what it costs.
Is Scan to BIM Worth the Investment?
Yes, scan to BIM is generally worth the investment for complex retrofits, historic preservation, or renovation projects involving tight spaces and outdated as-built drawings. The return comes from basing every downstream decision on measured fact, which is where the money otherwise lost to rework, clashes, and repeat site visits stays in the budget. How much it pays back depends on the building and what rides on the model:
- Highest return: The return is highest on large or geometrically complex buildings, poorly documented or heritage structures, and projects where a wrong dimension is expensive to correct on site.
- Lowest return: The return is lowest on small or simple spaces that are quick to measure by hand, new builds with no existing structure to capture, projects that already hold verified as-built drawings, and models that no one downstream will open.
- Variable return: The return on mid-size jobs depends on how much later work relies on the model and how tight the tolerances are.
For most existing-building work, the accuracy pays for itself the first time it prevents a costly clash on site. As the technology matures, the future of Scan to BIM points toward lower costs and wider use on mid-size projects. Before committing, a buyer needs three specifics: what the work costs, which software it runs on, and the challenges to plan for.
How Much Does Scan to BIM Cost?
Scan to BIM in the U.S. market typically ranges from about $2,500 for a small single-space scan to over $200,000 for a large, complex facility, driven mainly by project size, geometric complexity, and the required level of development.
Project size sets the base, since a larger floor area means more scanning time and a heavier point cloud to model. Geometric complexity pushes the figure up, because curved, ornate, or irregular structures take far longer to model than plain rectilinear ones. The required level of development moves it again, as an LOD 200 planning model costs a fraction of a fully detailed LOD 400 one.
Providers quote per square foot, per hour, or as a lump sum for the project scope. For a full breakdown by building type and LOD, our guide answers how much does Scan to BIM cost.
What Software Is Used for Scan to BIM?
The software used for scan to BIM is a set of tools led by Autodesk Revit, the industry-standard BIM authoring tool, together with point cloud processing, coordination, collaboration, and drafting tools. Revit, ReCap Pro, and Navisworks Manage each appear among the best scan to BIM software for their stage of the workflow. At ViBIM, the work runs on five Autodesk tools:
| Software | How We Use It |
|---|---|
| Autodesk Revit | Primary BIM authoring, where we build the model |
| Autodesk ReCap Pro | Opening and indexing the registered point cloud for Revit |
| Navisworks Manage | Quality control, clash detection, and coordination |
| Autodesk Construction Cloud (ACC) | Collaboration and data sharing with clients |
| AutoCAD | 2D drawings and documentation |
Two parts of that toolchain shape the outcome most, how the model gets built in Revit and how far the process can be automated.
What Is Scan to BIM in Revit?
Scan to BIM in Revit is the practice of linking the registered point cloud into the project as a reference and modeling parametric elements directly against it, rather than tracing over a flat image.
To convert point cloud to Revit model, the cloud is placed on shared coordinates first, so every discipline model lines up with it.
Can Scan to BIM Be Automated?
Yes, scan to BIM can be automated in part, since automated tools can classify surfaces and fit standard elements such as walls and floors, yet they still miss the irregular, one-off geometry that is the very reason most buildings get scanned at all. Routine steps automate well, among them point cloud registration, surface classification, and repetitive family placement through Revit API and Dynamo scripts. ViBIM builds proprietary in-house tools on top of these scripts, which speed up modeling and tighten quality control. The judgment-heavy work still needs a modeler, reading ambiguous as-built conditions and deciding how to model a feature the scanner only partly captured. How far Scan to BIM can be automated on a given project depends on how regular its geometry is.
What Are the Challenges of Scan to BIM?
The challenges of scan to BIM are the upfront cost, the specialist modeling skill, the heavy datasets, and the LOD setting.
- Upfront cost: Scanning hardware, software, and trained staff cost more than a manual survey.
- Specialist modeling skill: Modeling from a point cloud is a separate skill from design modeling. A team without it has to outsource the stage or train for it, and that gap is a common barrier to scan to BIM adoption.
- Heavy datasets: Point cloud files are too large for ordinary workstations and file sharing, so the team has to plan storage, hardware, and transfer before the scan arrives.
- LOD setting: The LOD has to be set with care, because too much detail wastes budget while too little weakens the model.

Modeling is a part of the workflow a project can hand to a specialist.
Scan to BIM Solutions from ViBIM
ViBIM is a specialist in scan to BIM and Revit modeling outsourcing, with over 11 years of experience and more than 1,000 completed projects. We deliver scan to BIM solutions for the modeling stage, converting point cloud data into accurate, intelligent BIM models for clients across the US, UK, Australia, Canada, and the EU. The client’s own survey team or its scanning partner captures the site.
ViBIM’s team and delivery record are listed below.
- Team: 30+ staff, all holding degrees in Architecture or Civil Engineering.
- On-time delivery: 99% of projects are delivered on time.
- Quality control: Every model passes two-layer independent QC, aligned with US and UK industry standards.
- Turnaround: Turnaround times run up to 30% faster than the industry average.
- Response time: The team replies within one hour, from 8 AM to 11 PM (GMT+7).
If you have a point cloud ready or a project to scope, our Scan to BIM services team can take it from point cloud to delivered model. Contact us to scope your project, or start with a free trial to see the quality first.

The clearest proof of that is in the projects themselves.
Scan to BIM Case Studies and Results
The scan to BIM case studies are three ViBIM projects modeled in Revit from the client’s point cloud data: a UK school renovation with irregular geometry, a Canada train station with a 10 mm tolerance, and an Australia museum with heritage detail.
UK school renovation (12,000 m² / ≈129,000 sq ft)
The point cloud of the school revealed 8 separate building volumes and dual-opening windows that standard Revit could not replicate. We built a custom Revit family using Void geometry to match the windows exactly, then coordinated all 8 models in Navisworks.
Result: The client received a coordinated model, LOD 300 for architecture and structure and LOD 400 for topography, that matched the as-built condition of the school.


Canada train station (6,700 m² / ≈72,000 sq ft)
The as-built model for the railway tracks needed a deviation tolerance of no more than 10 mm (0.4 in). We ran continuous deviation checks of the model against the original scans throughout production.
Result: The model met the 10 mm requirement.

Australia museum (22,000 m² / ≈237,000 sq ft)
The museum’s two heritage buildings held thousands of non-standard details, including domes, decorative columns, and historic façades. We built a custom Revit family library, modeling each repeating element once and reusing it across the project.
Result: Reusing the library sped up modeling and kept repeated elements consistent, and the museum received a data-rich model ready for its operations.


What Is the Difference Between Scan to BIM and BIM?
The difference between scan to BIM and BIM is that BIM is the digital model of a building and the information it carries, while scan to BIM is the process that produces that model from a laser scan of a structure that already exists. A Building Information Model (BIM) can also be authored from design intent for a new build, with no scan involved. Both routes end in the same kind of model, but the geometry of a scanned model comes from measured conditions instead of a design. The workflow is also confused with point cloud to BIM, point cloud modeling, as-built drawings, digital twins, and its own technical terms, and is often weighed against CAD to BIM.
Is Scan to BIM the Same as Point Cloud to BIM?
No, scan to BIM is not the same as point cloud to BIM, because point cloud to BIM is only one step inside it. Scan to BIM is the whole pipeline, running from the on-site laser scan through registration to a finished model. Point cloud to BIM is Stage 4, where modelers convert a point cloud to a BIM model. The narrower label usually appears when the modeling is scoped as a standalone deliverable, separate from the scanning.
Is Point Cloud Modeling the Same as Scan to BIM?
No, point cloud modeling is not the same as scan to BIM, because point cloud modeling is the broader category that covers any 3D model, 2D plan, or BIM deliverable made from a point cloud. The modeling stage of scan to BIM is the branch of 3D point cloud modeling that ends in parametric BIM objects. A visualization mesh made from the same scan is point cloud modeling too, yet the mesh holds no objects to schedule or coordinate.
Is a Scan to BIM Model the Same as As-Built Drawings?
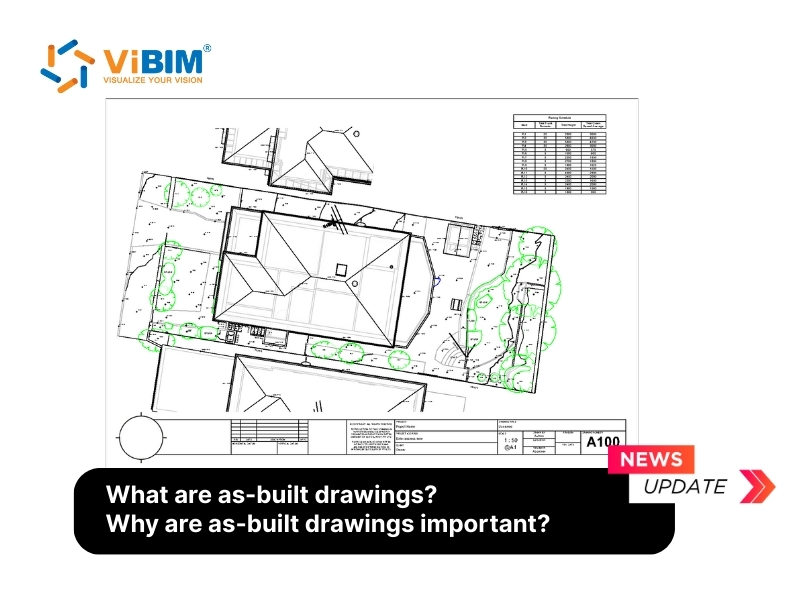
No, a scan to BIM model is not the same as as-built drawings, because the model is a 3D set of objects that carry data, while as-built drawings are 2D sheets that record the finished condition. The two are linked, since plans, sections, and elevations can be exported from the model as as-built drawings. The drawings alone cannot be queried for the material of a wall or checked for clashes.
Is a Scan to BIM Model the Same as a Digital Twin?
No, a scan to BIM model is not the same as a digital twin, because the model records the building at the time of the scan, while a digital twin stays connected to live data from the building in operation. The model is the usual starting geometry for a twin, and a digital twin builds on BIM data by linking sensor readings and maintenance records to the model’s objects.
What Scan to BIM Terms Should You Know?
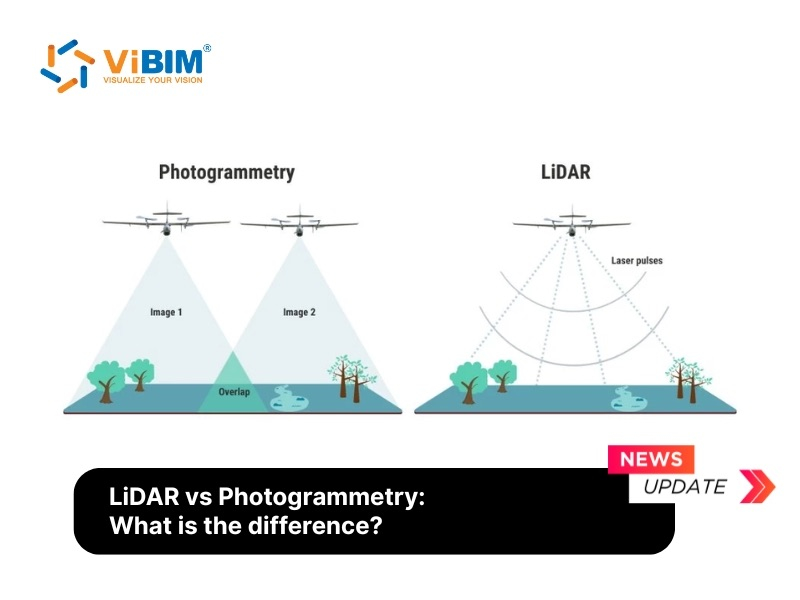
The scan to BIM terms to know are point cloud, registration, level of development (LOD), level of information (LOI), tolerance, and as-built model. Point cloud and as-built model name the input data and the output, registration names a processing step, and LOD, LOI, and tolerance are the specifications written into the project scope. Other Scan to BIM terms cover capture methods such as LiDAR and photogrammetry and model checks such as clash detection and Level of Accuracy (LOA).
How Does Scan to BIM Differ from CAD to BIM?
Scan to BIM differs from CAD to BIM in its starting input, a physical laser survey versus a set of existing drawings, although both produce a BIM model. A drawing-based model inherits any error its source drawings carry, while a measured one reflects the real structure, so the scan-based route is the safer choice when drawings are old, incomplete, or never verified.