Scan to BIM Quality Control is the rigorous process of validating and verifying that a 3D Building Information Model accurately reflects the physical reality captured by laser scanning technology. This encompasses a comprehensive range of tasks, from verifying point cloud registration and filtering data noise to performing detailed deviation analysis and semantic checks. The Scan to BIM process transforms millions of raw data points into intelligent digital geometry, a workflow that demands high precision to be effective. Consequently, rigorous quality control is critical because it eliminates geometric errors and data omissions before they reach the construction site, thereby reducing the risk of costly rework and ensuring the model provides substantial value for renovation and facility management.
This comprehensive guide outlines the critical steps and methodologies for achieving precision in your projects. We will examine essential quality control techniques across the pre-conversion, modeling, and post-conversion phases, and review the top tools and software used for verification. Furthermore, we will discuss common mistakes to avoid, explore emerging trends like AI-driven validation, ensuring your deliverables meet the highest industry standards for accuracy and reliability.

Top 5 Challenges in Scan to BIM Conversion
Scan to BIM conversion turns 3D scanned data into buildable models, but the workflow is sensitive to multiple risks. Even with expert technicians, several challenges can compromise the quality of the final deliverable:
- Individual scans must be “stitched” together (registered) to form a single, cohesive point cloud. If this alignment is off, the entire foundation of the model is flawed, leading to ghosting, duplicated elements, or dimensional inaccuracies.
- Laser scanners cannot capture what they cannot see. Objects like columns, furniture, or equipment create “scan shadows” or voids, leaving data gaps. Modelers must use their expertise to interpret these missing areas, which can lead to errors if not handled correctly.
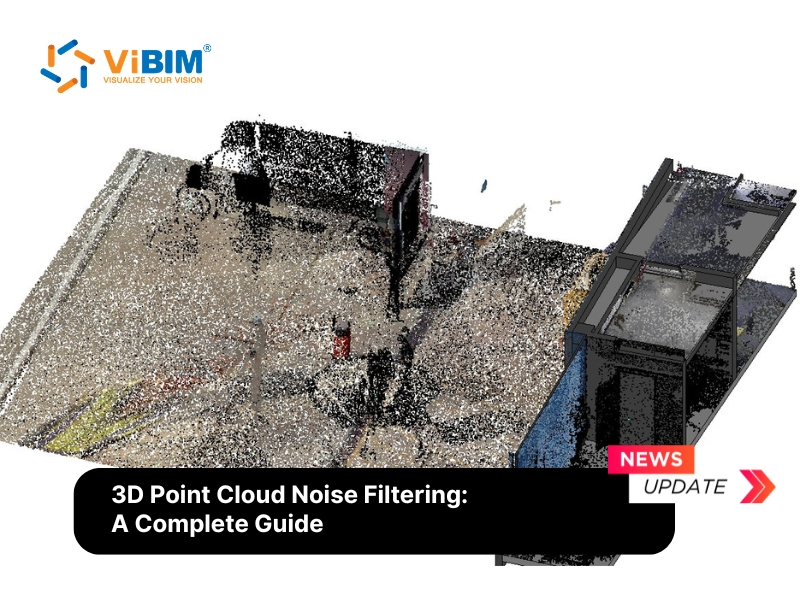
- Scans can pick up “noise” from unwanted elements like rain, dust, or people moving on-site. Furthermore, scan density (the number of points per area) can vary, making it difficult to model intricate details accurately.
- The conversion from points to objects is a human process. A modeler might misinterpret the point cloud, model an element at the wrong LOD, or make assumptions about non-visible elements that turn out to be incorrect.
- Data is often moved between multiple software—registration software (like Faro Scene), modeling software (like Revit), and validation software (like Navisworks). Without proper data management, information can be lost or corrupted during these transfers.
To mitigate these risks and ensure the final deliverable is reliable, a systematic quality control (QC) process is implemented.
Why Scan to BIM Quality Control Matters
Scan to BIM quality control (QC) matters because it ensures the accuracy, reliability, and integrity of the digital model, which in turn drives better decision-making, reduces costly rework and delays, and enhances overall project outcomes across the entire building lifecycle.
Here are key reasons why Scan to BIM quality control is crucial:
- Guarantees Geometric Accuracy: Inaccurate or incomplete BIM models can lead to costly errors during design, construction, and renovation phases. Quality control techniques ensure that BIM models faithfully represent the scanned reality, maintaining strict adherence to required tolerances (e.g., ±10mm for general architecture or ±2mm for heritage sites).
- Mitigates Construction Risks: Construction projects are inherently complex with interdependent workflows. Rigorous quality control mitigates risks associated with design clashes, construction conflicts, and deviations from project specifications, effectively safeguarding project timelines and budgets against unforeseen rework.
- Enhances Efficiency and Reduces Rework: Detecting and rectifying errors early in the modeling phase is exponentially cheaper than addressing them during construction or occupancy. QC streamlines the project workflow, minimizing the “back-and-forth” and keeping the project schedule on track.
- Ensures Regulatory Compliance: Adherence to building codes and BIM standards (such as ISO 19650) is critical. QC validates that the model not only looks correct but also contains the necessary data and structure required for regulatory approvals and legal liability protection.
- Data Integrity for Facility Management: BIM models serve as digital twins of physical assets, offering valuable insights for decision-making. QC ensures that non-geometric data, such as material types, equipment tags, and maintenance schedules, is accurate, enhancing the reliability of the model for long-term facility management.
- Client Satisfaction: Clients expect accurate, visually compelling representations of their built environment. By delivering high-quality, verified BIM models, AEC professionals build trust and foster long-term partnerships, positioning themselves as reliable experts in the field.
Now that we understand the critical importance of quality control in 3D Laser Scan to BIM, let’s explore the specific techniques used throughout the Scan to BIM process.

Essential Quality Control Techniques for Scan to BIM
Scan to BIM quality control consists of rigorous checks on the raw scan data, real-time verification during the modeling process, and a final, detailed audit of the completed model. To guarantee a precise Digital Twin, these techniques are applied across three specific phases:
Pre-Conversion Techniques
Before a single wall is modeled, the foundation must be solid.
- Point Cloud Registration Checks: Before any modeling begins, the point cloud must be perfect. This involves analyzing the point cloud registration report from the scanning software to check for errors in scan alignment. Technicians look for high “mean absolute error” values and visually inspect the cloud for “ghosting” (double images) or “stitching” errors that indicate misalignment.
- Noise Reduction and Data Cleaning: Raw scans often contain artifacts that can mislead modelers. Technicians apply automated “despeckle” filters to remove stray pixels and manually segment out non-static objects (like moving people, vehicles, or reflections on glass) to ensure only permanent building features remain for modeling.
- Coordinate System Verification: To ensure the model aligns with site surveys, the BIM Lead verifies the georeferencing. This involves checking that the Survey Point and Project Base Point in the BIM software match the specific GPS coordinates or local grid provided by the surveyors.

During-Conversion Techniques
Quality assurance happens in real-time as modelers interpret the data, using specific viewing techniques to validate geometry.
- Section Box Validation: Modelers create thin, 3D section boxes (slices) in the BIM software to cut through both the model and the point cloud simultaneously. By viewing these slices in an orthographic view, they can visually verify that the core boundaries of walls, slabs, and beams sit perfectly flush against the point cloud data points.
- Orthogonality and Verticality Checks: While point clouds are imperfect, building logic must be maintained. Modelers use constraint tools to ensure walls are perfectly vertical (90 degrees) and floors are horizontal, checking against the scan data to distinguish between actual structural leaning and simple scan noise.
- View Range Isolation: To prevent interpreting data from the wrong elevation, modelers strictly manage view ranges. By isolating the “View Depth” and “Top Plane” to a specific active level, technicians ensure they are not tracing ceiling plenums from the floor below or piping from the floor above.
Post-Conversion Techniques
Once the modeling is complete, the final validation phase uses computational analysis and logical checks to certify the deliverable against the original reality capture data and project specifications.
- Geometric Accuracy & Ground Truth Verification: Beyond visual alignment, the model must be validated against hard survey data. Technicians verify the model coordinates against the original survey control points (ground truth measurements) to ensure the building is correctly positioned in the geospatial coordinate system. This step quantifies deviations using statistical tools to confirm the model aligns with site boundaries and benchmarks.
- Semantic Validation (Object Classification): Geometric accuracy is useless if the data structure is wrong. This step validates that elements are correctly categorized (e.g., ensuring a “Floor” is not modeled as a “Generic Model” and a “Fire Door” is recognized as a door entity, not a window). Using object recognition algorithms or model checking rules (like Solibri), teams verify the correctness of object attributes and classifications.
- Computational Deviation Analysis: Technicians use software like CloudCompare, Verity, or specialized Revit add-ins to compute the distance between the BIM surfaces and the point cloud data points. This generates a color-coded heat map identifying surfaces that exceed the defined tolerance (e.g., ±15mm) where elements within tolerance (e.g., <10mm) typically show as green, while elements deviating beyond the limit appear in red. This visual distinction allows for immediate identification of warped walls, sagging floors, or objects modeled significantly larger than reality.
- Automated Clash Detection: The aggregated model is exported to Navisworks or ACC to run comprehensive clash tests between model elements. QC managers set up specific “Search Sets” to check for Hard Clashes (physical intersections) and Clearance Clashes (insufficient maintenance space), grouping results to filter out false positives. To master the specific workflow of setting up these tests and managing results effectively, read our detailed guide on Navisworks clash detection.
- Data Integrity & Inconsistency Checks: To validate the “Information” in BIM, technicians use Schedules within Revit to filter and sort elements. This highlights missing data fields (e.g., empty “Fire Rating” parameters on doors) or duplicate elements (e.g., two walls occupying the same space), ensuring the database is clean and queryable.

Tools and Software for Scan to BIM Verification
Achieving high accuracy requires specialized tools for Scan to BIM quality control. While standard BIM platforms are powerful, dedicated QC tools elevate the process.
- Autodesk Revit: The primary authoring tool for creating intelligent 3D models. It supports parametric objects that allow for precise adjustments and data integration.
- Autodesk Navisworks: Essential for aggregating models from different disciplines and performing advanced clash detection and 4D construction simulation.
- Solibri Model Checker: A rule-based checking tool that validates model integrity, ensuring compliance with building codes and modeling standards.
- Cloud Comparison Tools: Platforms like Cintoo or specialized plugins allow for the overlay of point clouds and BIM models to perform deviation analysis and visual verification.
Common Mistakes to Avoid in Scan to BIM Quality Control
Here is common errors detected during Scan to BIM quality control:
- Over-Reliance on Automation: While “auto-extraction” tools are improving, they often misinterpret complex geometries. Human oversight is mandatory to verify what the software created.
- Ignoring Scanner “Noise”: Modeling a pipe based on noisy data without cross-referencing panoramic photos (like Leica TruViews) can lead to identifying the wrong diameter or insulation thickness.
- Incorrect Coordinate Setup: Failing to align the BIM model’s internal origin with the point cloud’s survey coordinates (georeferencing) makes the model useless for site coordination.
- Misinterpreting “Hidden” Elements: Guessing the location of elements hidden behind drop ceilings or inside walls without marking them as “assumed” can mislead contractors.
Tip: Always define the BIM Level of Development (LOD) clearly. As stated in BIM guidelines, the required level of 3D modeling must be carefully determined depending on the goals set for model use.

Top Trends in Validation and QC for Scan to BIM Conversion
The future of Scan to BIM QC is focused on automation and immersion.
AI-Driven Automated Quality Checks
Artificial Intelligence is revolutionizing QC by training algorithms to recognize building features. AI-powered validation systems now automatically detect inconsistencies between BIM models and source point cloud data, drastically cutting manual review times. These systems handle routine checks like pattern recognition and geometry error detection, allowing human experts to focus on complex decision-making.
Looking for efficiency? AI isn’t just for checking errors—it is now capable of creating the geometry itself. To understand how algorithms are reducing manual modeling time by up to 50%, read our deep dive on Scan to BIM Automation.
Rule-Based and Semantic Validation
Advanced model checkers now use semantic enrichment to validate not just geometry but the logic of the model. For example, rules can verify that a “door” object is actually located within a “wall” object, or that all “fire-rated” walls have the correct material properties.
Real-Time Validation via Cloud Collaboration
Cloud platforms enable real-time sharing and checking of models. This allows stakeholders to view the model overlaid on the scan data from anywhere, facilitating faster approvals and collaborative issue resolution.
ViBIM’s Quality Guarantee: How We Ensure 99% Accuracy
At ViBIM, we understand that our clients use our models for critical fabrication, renovation, and facilities management, where even minor errors can lead to budget overruns and schedule delays. A model is only useful if it is reliable, which is why we don’t treat quality control as an afterthought. Instead, we integrate a systematic, dual-layer process from day one.
Our Laser Scan to BIM services workflow combines cutting-edge technology with rigorous human oversight to ensure every model is technically reliable, traceable, and decision-ready.
1. The 36-Point Technical QA/QC Checklist
Our process begins with a comprehensive 36-point checklist designed to standardize the entire model for your team’s usability. This systematic approach aligns with international standards like BS8541-1:2012 and enforces strict quality across three key areas:
- Geometric Scope Compliance: We verify that every element matches the point cloud within the defined deviation tolerance (e.g., ±30mm for walls) and strictly adheres to the specified Level of Detail (LOD) and Level of Information (LOI).
- Strict Naming & Data Structure: All elements, from files (e.g., G-PCL-…) to families and materials (e.g., G-ABC-…), follow precise naming logic. This guarantees perfect traceability and seamless coordination for your team.
- Model Performance Optimization: We ensure optimal performance in Revit and Navisworks. We use only parametric, metric-based families (avoiding in-place models), purge all unused data, and ensure final models are audited, compacted, and typically kept below 200MB.
Need a starting point? If you are building your own quality process, reviewing a professional Scan to BIM checklist can help ensure you don’t miss critical steps.
2. Dual-Layer Independent Verification
We implement a rigorous, two-layer independent quality check (QC) process to eliminate human error.
- Layer 1 (Self-Check): The production team performs an initial validation of their work against the project scope and point cloud data.
- Layer 2 (Specialist Review): A dedicated QA/QC specialist, independent of the modeling team, conducts a comprehensive review covering technical accuracy, geometry, parameters, and overall data consistency.
3. Advanced Automation & Custom Solutions
For large-scale and complex projects, manual checking is not enough. We leverage advanced automation tools and proprietary custom-developed QA/QC solutions to enhance accuracy and efficiency. This combination of expert human oversight and automated error detection allows us to maintain a 99% on-time delivery record while meeting the most demanding accuracy standards.
Discover how our Revit 3D BIM modelling services can elevate your next project with guaranteed accuracy. Concerned about the budget? Get a transparent breakdown of how much does Scan to BIM cost to plan your project effectively.

FAQs
What is the acceptable tolerance for Scan to BIM?
The acceptable tolerance depends on the project requirements. Generally, tolerances range from +/- 10mm to +/- 30mm for standard architectural and structural elements. However, for heritage projects or high-precision industrial facilities, tolerances may be as tight as +/- 2mm to 5mm. It is crucial to define these tolerances in the scope of work before modeling begins.
How does deviation analysis work in Revit?
Deviation analysis in Revit (often using plugins) works by calculating the perpendicular distance between the modeled surface (e.g., a wall face) and the nearest points in the point cloud. The software then visualizes this distance using a color scale (heat map)—for example, blue for “too far inside,” red for “too far outside,” and green for “perfect alignment.”
The Difference Between QA and QC in Scan to BIM
Quality Assurance (QA) is process-oriented, while Quality Control (QC) is product-oriented. QA involves setting up the standards, workflows, and training before and during the modeling process to prevent errors (e.g., defining LOD, training staff). QC involves inspecting the final model to identify and correct defects (e.g., clash detection, deviation analysis) before delivery.